[SwiftUI]SwiftUI 에서 AppDelegate, SceneDelegate 사용하기
프로젝트를 생성할 때 SwiftUI를 선택하면 기본적으로 AppDelegate와 SceneDelegate가 생성되지 않습니다. 하지만 아직까지 외부 SDK연결이나 APNs와 같이 AppDelegate가 필요한 상황이 있고, 기존 UIKit 에서 SwiftUI 로 마이그레이션하는 과정에 있다면 SceneDelegate에서 SwiftUI 뷰를 UIKit ViewController로 호스팅해 보여주는게 편할 것 같습니다.
그래서 오늘은 SwiftUI로 프로젝트 생성 후, AppDelegate와 SceneDelegate를 만들기, ContentView를 SceneDelegate를 통해 띄우는 것 까지 해보겠습니다.
SwiftUI 프로젝트를 생성합니다.
XCode12 까지는 프로젝트를 생성할 때 AppDelegate, SceneDelegate를 생성하도록 설정할 수 있었다고 하네요.
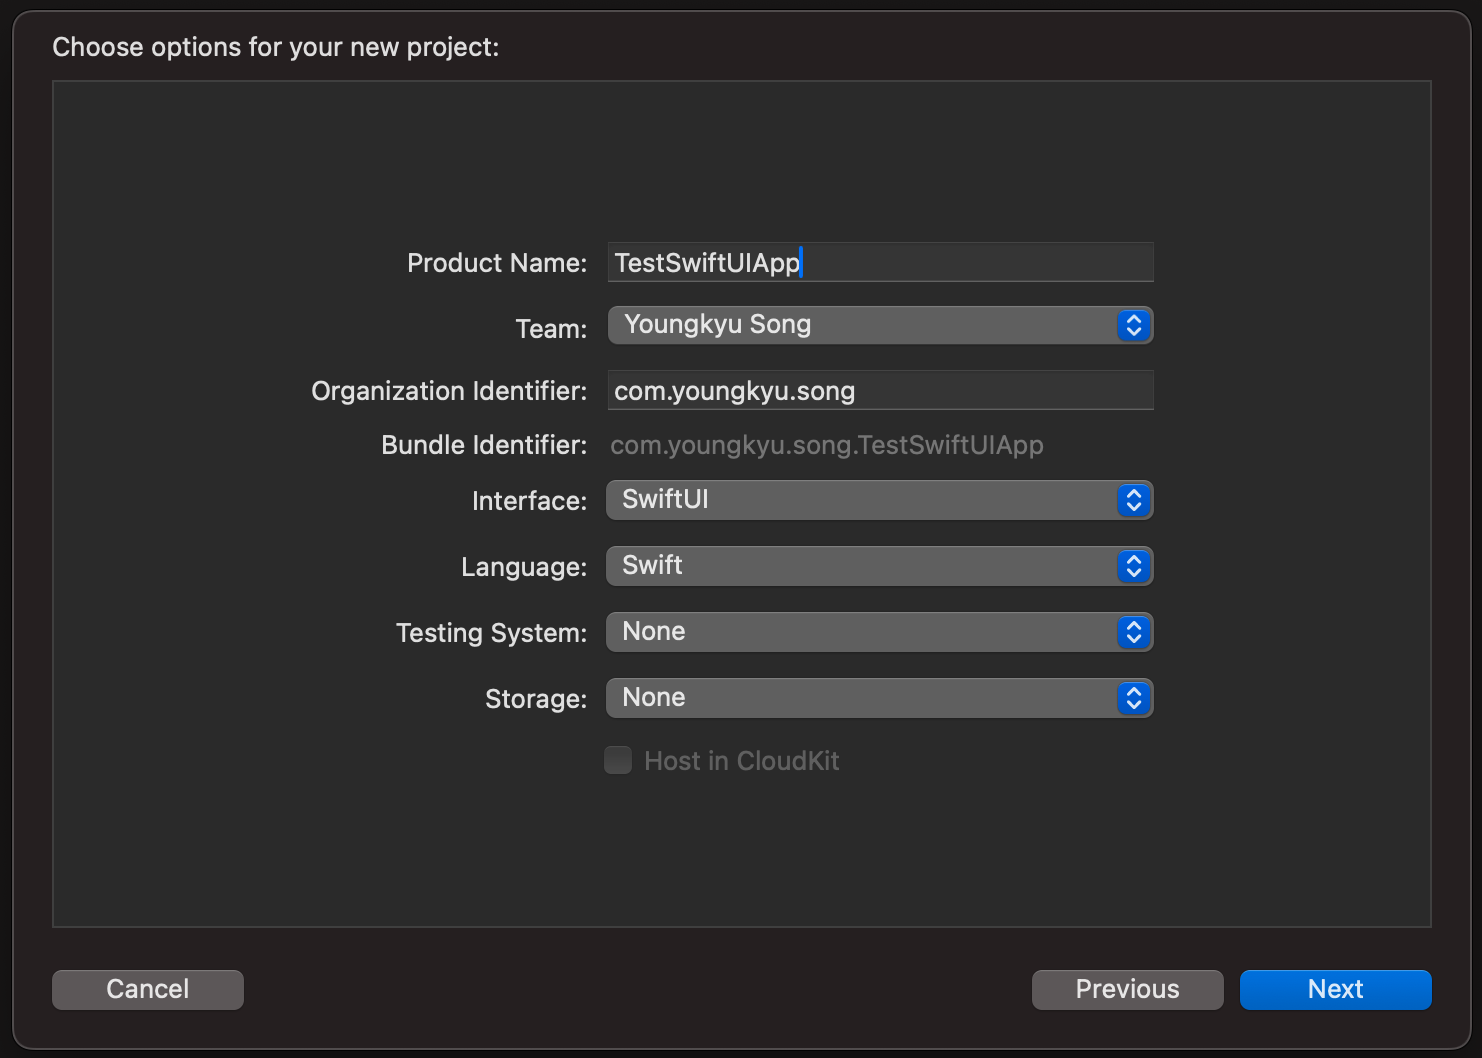
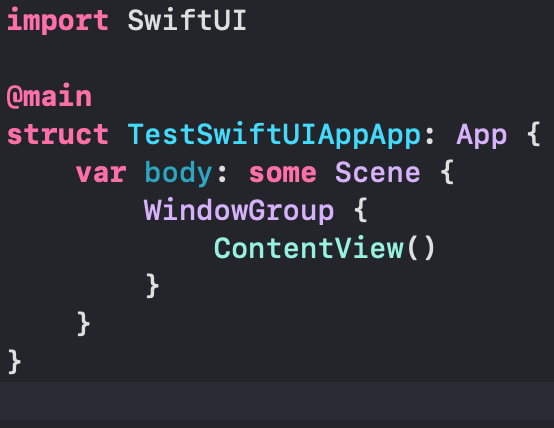
프로젝트를 생성하면, 델리게이트들은 없고 App 하나만 존재합니다. App 프로토콜의 역할은 나중에 알아볼게요!
1. AppDelegate 추가
AppDelegate 먼저 추가해보겠습니다.
didFinishLaunchingWithOptions메소드는 앱이 런치된 후 호출되는 메소드입니다.
NSObject 를 채택해주어야 합니다.
1
2
3
4
5
6
7
8
import UIKit

class AppDelegate: NSObject, UIApplicationDelegate {

    func application(_ application: UIApplication, didFinishLaunchingWithOptions launchOptions: [UIApplication.LaunchOptionsKey: Any]?) -> Bool {
        return true
    }
}
2. SceneDelegate 추가
SceneDelegate도 추가해줍니다. SwiftUI로 만들어진 뷰를 UIKit과 호환될 수 있도록 UIHostingController(rootView:) 로 감싸줍니다.
NSObject 를 채택해주어야 합니다.
1
2
3
4
5
6
7
8
9
10
11
12
13
14
15
16
17
import SwiftUI

class SceneDelegate: NSObject, UIWindowSceneDelegate {

    var window: UIWindow?

    func scene(_ scene: UIScene, willConnectTo session: UISceneSession, options connectionOptions: UIScene.ConnectionOptions) {
        guard let windowScene = (scene as? UIWindowScene) else { return }
        window = UIWindow(frame: windowScene.coordinateSpace.bounds)
        window?.windowScene = windowScene


        window?.rootViewController = UIHostingController(rootView: ContentView())
        window?.makeKeyAndVisible()
    }

}
3. AppDelegate 연결
@UIApplicationDelegateAdaptor 프로퍼티 래퍼를 통해 델리게이트를 연결해줄 수 있습니다.
UIApplicationDelegateAdaptor 공식문서 링크
1
2
3
4
5
6
7
8
9
10
11
12
import SwiftUI

@main
struct TestEntryAppApp: App {
    @UIApplicationDelegateAdaptor(AppDelegate.self) var delegate
    // @UIApplicationDelegateAdaptor var delegate: AppDelegate 도 가능
    var body: some Scene {
        WindowGroup {
            ContentView()
        }
    }
}
4. SceneDelegate 연결
SceneDelegate는 AppDelegate에서 연결해줄 수 있습니다.
1
2
3
4
5
6
7
8
9
10
11
12
13
14
import UIKit

class AppDelegate: NSObject, UIApplicationDelegate {

    func application(_ application: UIApplication, didFinishLaunchingWithOptions launchOptions: [UIApplication.LaunchOptionsKey: Any]?) -> Bool {
        return true
    }

    func application(_ application: UIApplication, configurationForConnecting connectingSceneSession: UISceneSession, options: UIScene.ConnectionOptions) -> UISceneConfiguration {
        let sceneConfig = UISceneConfiguration(name: "Default Configuration", sessionRole: connectingSceneSession.role)
        sceneConfig.delegateClass = SceneDelegate.self // 여기서 연결
        return sceneConfig
    }
}
5. App에서 ContentView 제거
ContentView를 SceneDelegate에서 띄워주고 있으니, App에선 없애줍시다.
1
2
3
4
5
6
7
8
9
10
11
import SwiftUI

@main
struct TestEntryAppApp: App {
    @UIApplicationDelegateAdaptor(AppDelegate.self) var delegate
    var body: some Scene {
        WindowGroup {
        }
    }
}
이렇게하면 AppDelegate 와 SceneDelegate를 만들고, SwfitUI 뷰를 UIVIewController로 호스팅해 띄우는 것까지 정상적으로 동작하는 걸 볼 수 있습니다.
참고링크
https://medium.com/hcleedev/swift-swiftui-%ED%94%84%EB%A1%9C%EC%A0%9D%ED%8A%B8%EC%97%90-appdelegate-scenedelegate-%EB%A7%8C%EB%93%A4%EA%B8%B0-4fa2d85191e